Oktava Ribbon Mic Mod Fun!
I decided to do the popular transformer upgrade to my trusty Oktava ML52 before an upcoming horn trio overdub session. I started actual modifications on a Friday. The session was on the Sunday following.
I wanted to do a few things to the mic: upgrade the transformer to the fancy Lundahl LL2913, cut out the little metal tines that form part of the housing, upgrade the internal wiring and build a new windscreen. I also decided I would tackle any ribbon problems I might find in the motor assembly. This last part had me a bit anxious. I am used to basic soldering and was confident the wiring of the mic would be a no brainer. I am less comfortable with little fiddly bits and have no real world experience messing around with the guts of a ribbon mic.
To prep for the upcoming project, I did some internets.
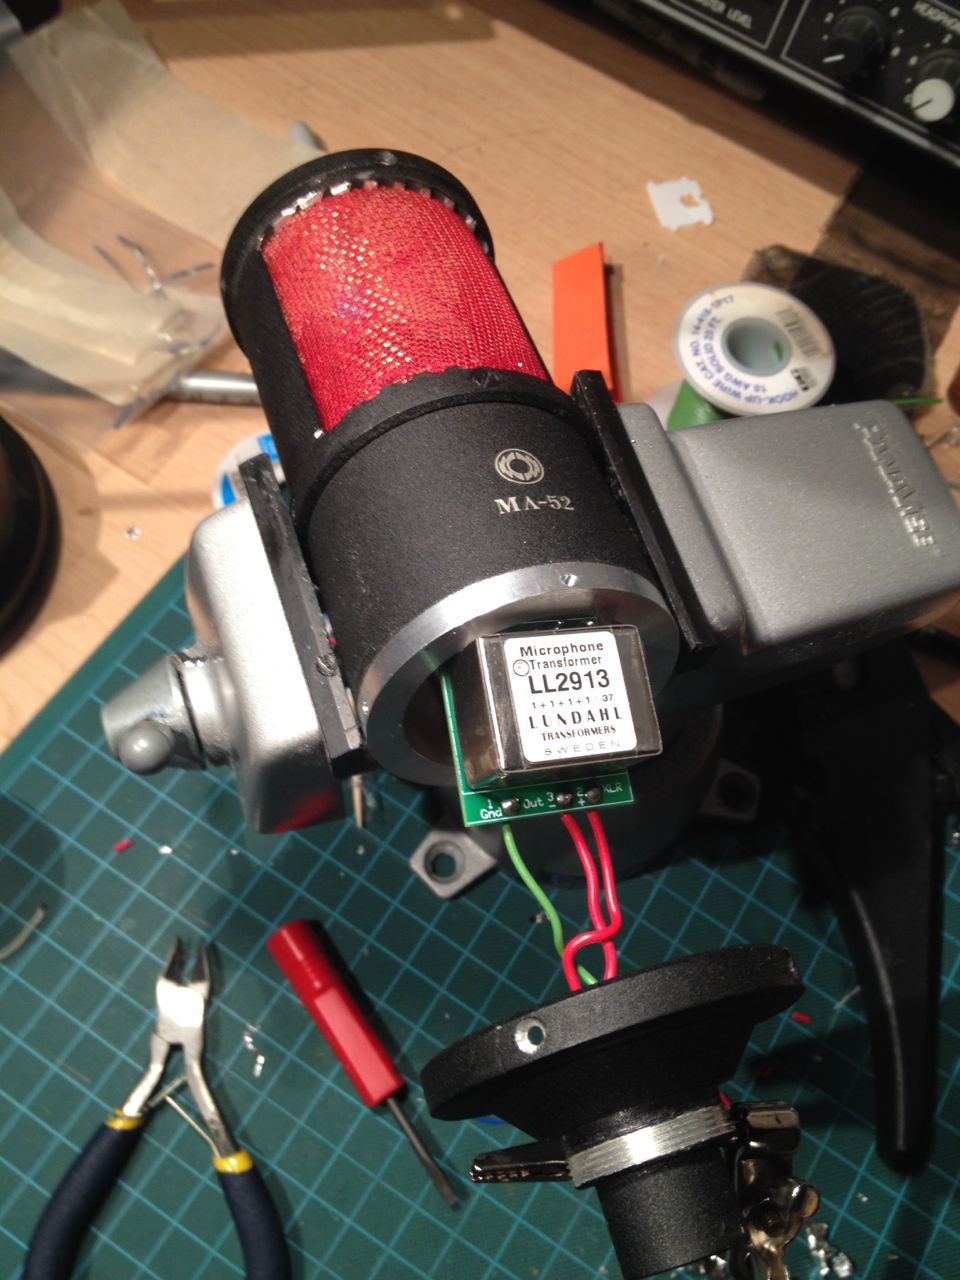
I ordered the transformer from KK Audio, who also provided a great little circuit board to make wiring really easy. The board is clearly labeled with ribbon connection and XLR connection and handles all of the pin tying necessary to get in/out of the part.
I ordered some 1.8 micron aluminum motor material from the Lebow Company. They have smaller sheets of “low cost aluminum foil” for about $25-30.
I picked up some wire mesh screen from the local hobby shop and some fabric. I also stopped at an art supply store to pick up a paint tube squeezer to corrugate the ribbon material if I encountered the need.
I have to say, at this point I had already invested in the aluminum and the squeezer. I was pretty committed to replacing the stock ribbons with the lightweight stuff I ordered.
Body modifications first:
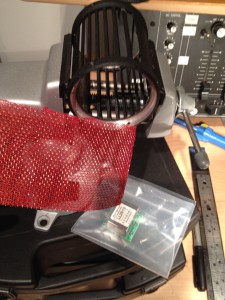
I fashioned a new windscreen out of the fabric and wire mesh.
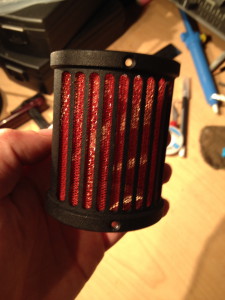
This is a pic of V1. I wrapped the mesh in fabric entirely. I later bailed on this one and built a new one with mesh only on the inside.
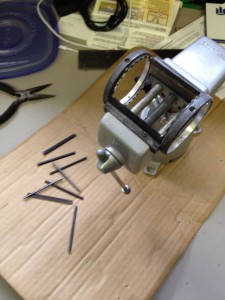
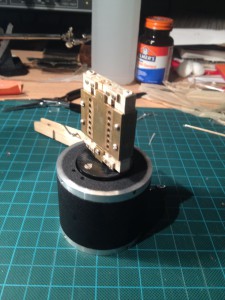
Using the Dremel, I cut the spines out of the mic housing.
Make sure to have some pliers handy to hang onto the spines!
Also, wear safety goggles!!
I decided not to mess with the curved dome of the mic as it was getting later in the day and I still had ribbons on my mind.
Ribbon building:
I took apart the motor of the mic and discovered that one of the two ribbons had gone slack. I was in up to my waist now..
I measured the original ribbon and cut strips that matched it- about 3mm each.
The foil ships in a paper sheet. it tends to stick to this. I had brought some parchment paper from the kitchen at home. I’m pretty sure wax paper would work as well.
I found it easiest to cut about a 4 inch square from the main foil sheet and sandwich it in a folded piece of the parchment.
I tried to cut several 3mm strips at a time- allowing for screwups, but they got tangled up with handling. I also tried cutting longer strips- 8 inches or so.. equally awkward. This stuff is REALLY fragile! I resorted to 1 strip at a time from the 4-inch square.
I then transferred that strip into another folded piece of parchment for a trip through the crimper.
I found I had to go back and forth on the paint squeezer a bunch of times to imprint a good corrugation to the ribbon.
The right corrugation is key to the ribbon having a bit of flex and also some structural support.
I’m not convinced that buying the cheap paint squeezer was the best idea. I bought the $8 one. There is a $20 one that might have metal gears. I think the metal gears would do a better job than the cheap plastic. But with enough commitment, this did well enough to put a groove into the ribbon:
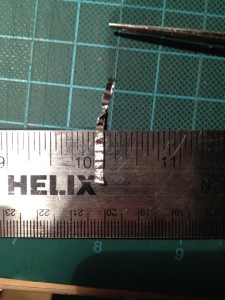
I then broke about 5 or 6 ribbons before getting one to lay into the assembly with any regularity.
I used a blunted Qtip with a touch of rubber cement to attach to one end of the ribbon and guide it into place.
this pic is getting close to a consistent tension. notice it’s not locked down yet and there is still some excess ribbon dangling off the end.
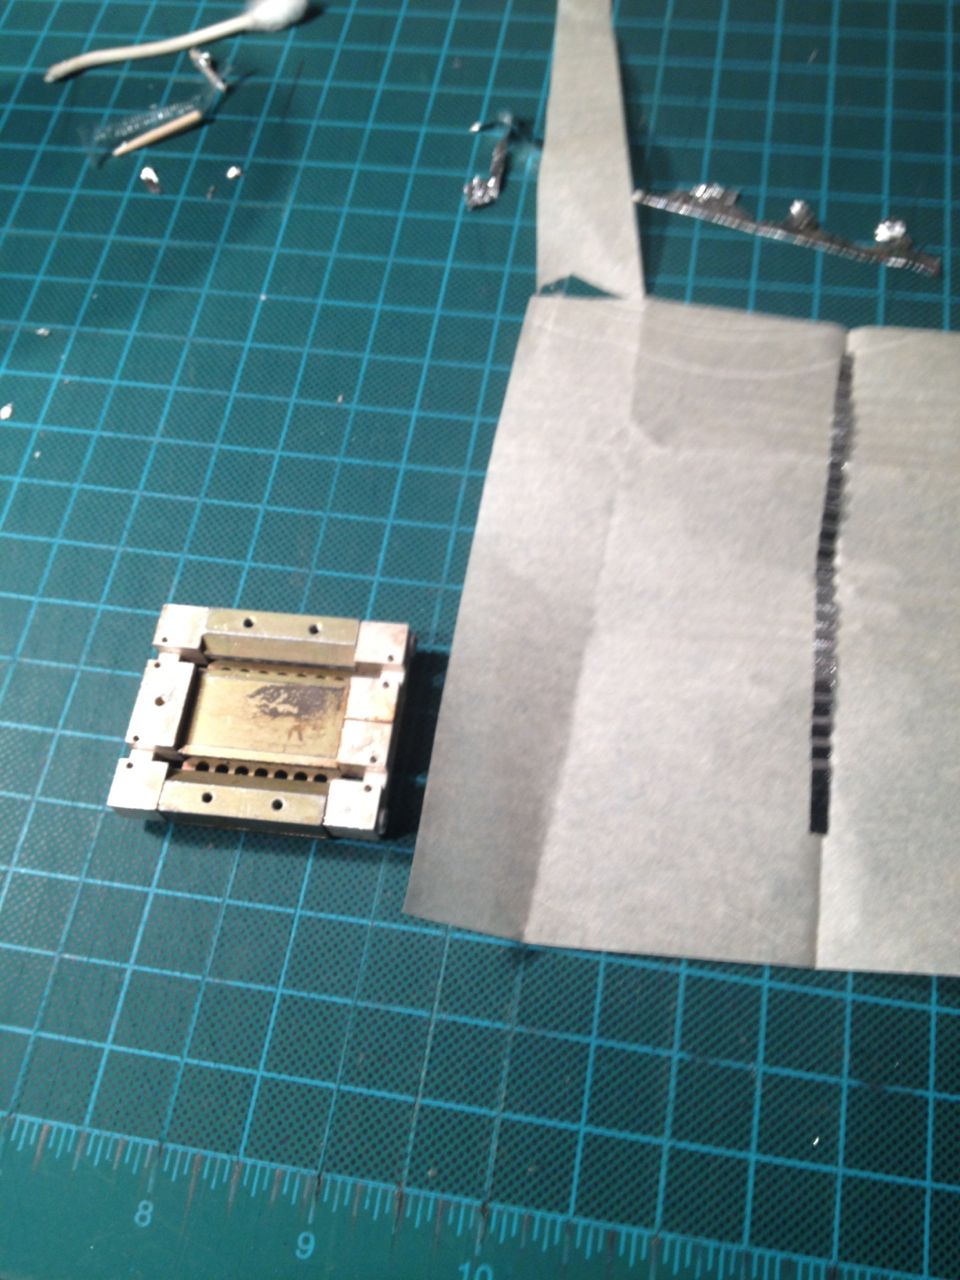
Here is the pair of ribbons installed! At this point, I put the motor back together and focused on the wiring.
Soldering:
I ran two new leads from the capsule down to the circuit board for the transformer. They had attached to the motor with lugs. I thought it wise to recycle the lugs and am glad I did. Lugs on capsule side through the body to the tranny.
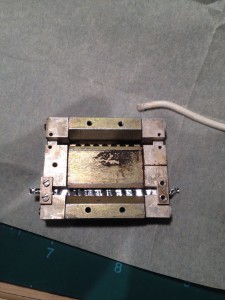
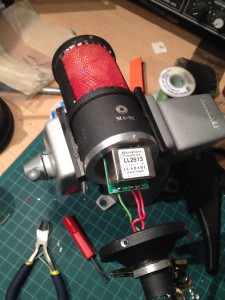 I soldered the transformer to the KK board, the leads from the capsule and the leads to the XLR an d put everything back together.
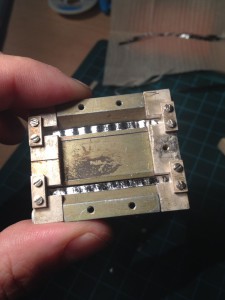
I used some foam I had lying around to wedge the transformer and board into the body with a bit of insulation from any shorts.
Done! about 3-4 hours of actual bench time. I plugged it in and got a signal with a tiny bit of 60hz hum accompanying. No problem, probably just the top of the housing or something… I left for the day.
I came in the next morning to test the mic a bit more and found it not making any sound! I decided that the most logical problem area was the ribbons.
I got the capsule apart and started poking at it with a test meter. My meter skills are terrible! pretty much continuity and basic voltage.. I found that I could make one ribbon flex in test mode, but not the other one.
I cut and corrugated new ribbons. I think I only messed up three or four this time…
New ribbons installed. And all is well!!! No hum, sounds like a ribbon mic.
I did some quick tests playing trumpet into it and also into another ML52. Actually an ML52-2, a slightly different revision. I wasn’t sure if I liked the modded mic or not. It worked and sounded like a functioning ribbon mic, but seemed like it had a lot more high end and a lower(?) output than the stock ML52-2.
I thought maybe I had tensioned the ribbons too high. Anyway, the session was the next day and I decided to at least give it a go.
The session:
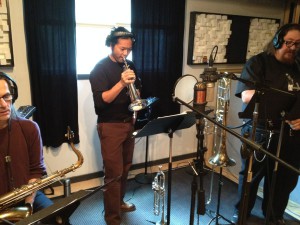
Sunday morning I set up as follows:
Trombone: Stock ML52-2 and AT4047 safety
Trumpet: HOTROD ML52 and AT4047 safety
Sax: Beyer M130 and AKG 414XLS to match safety mics
Room: Mid/side stereo Beyer M160 mid and M380 sides (M380 is a great fig. 8 mic that uses a headphone element)
The hot rodded mic performed way better than I expected. I would have been happy if it didn’t blow up in the first five minutes.
I did notice that it was out of phase, but luckily that’s why there’s phase switches. I remedied that after the session with a quick wire swap at the capsule (those lugs came in handy).
The horn section are all veteran players and I’d worked with at least two of them a couple of times before. We all agreed the trumpet sounded killer!! The player, Henry Hung, is certainly gifted. The mic handled his complex tone in a very classy manner and never screamed or held back during the tracking of arrangements for five tunes.
After the first pass was done, I moved the mic over to bari sax and found it to handle business. Ultimately, I lean more towards the FET AT4047, but the ribbon mic sounded really useful as well.
Having the option during mixing will certainly be useful.
All in all, I am really happy that I chose to modify the mic and I think it will become a really useful tool as I get used to it’s new character.
I think a better wire mesh is appropriate for the windscreen. I do believe what I used is literally porch screen!! But given the timeframe I had, it worked out well.
I will probably install a new transformer in the stock ML52-2 and wait to do any body modification.
I am not looking forward to cutting any more ribbons anytime soon!